Motorcycle accessories 3D scanning case
The customer is a well-known motorcycle manufacturer. In order to meet the market demand and improve the competitiveness of the company, the customer decided to abandon the traditional measurement method and introduce a new measurement method (using our handheld three-dimensional scanner HOLON760 for three-dimensional inspection) to modify the motorcycle. In order to improve the overall performance and design of the motorcycle, improve product development speed and product improvement.

Motorcycle effect display
Practical problems
This case
Shape customers: well-known motorcycle manufacturers
Scanning object: off-road motorcycle parts scanning modification detection
Testing equipment: laser handheld 3D scanner HOLON760
Measurement requirements: to detect the quality deviation after the motorcycle parts production modification, find the possible problems of the product, analyze and adjust according to the data obtained from the inspection, and improve the unreasonable part of the product structure.
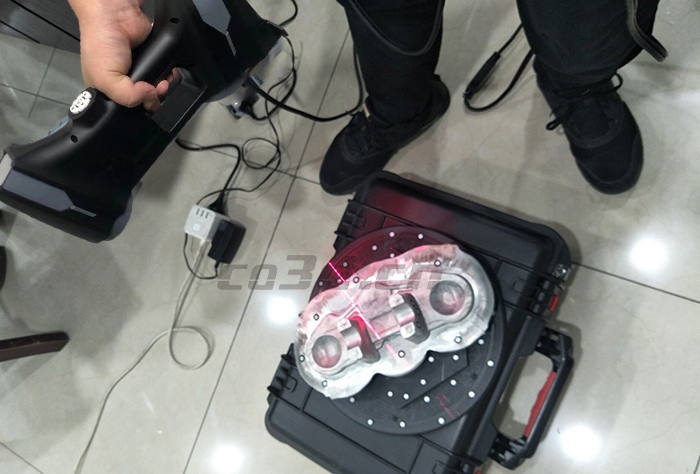
Motorcycle parts scanning site map
The motorcycle accessories are small in size, and the surface of the workpiece has irregular curved surfaces. The traditional detection method uses a coordinate measuring machine to acquire data by means of dot punching. Since the sample has a complex surface, the reference point of the coordinate machine is difficult to determine, and it is impossible to obtain complete three-dimensional data and it takes a long time to waste too much human and material resources.
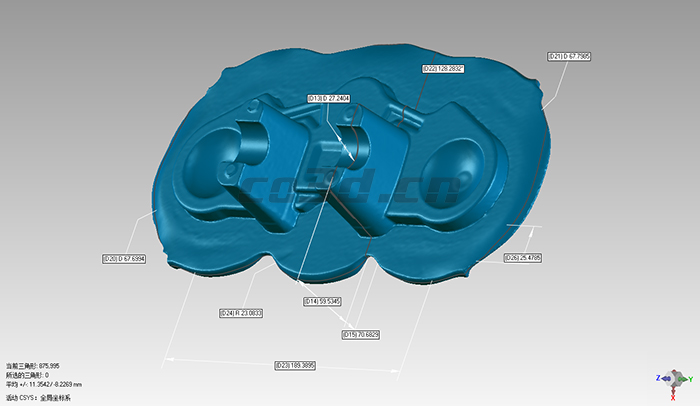
Motorcycle accessories STL data chart
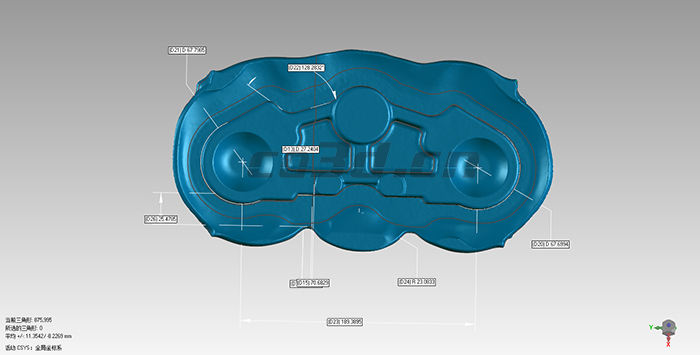
Motorcycle accessories STL data chart
With the shape-moving handheld 3D scanner HOLON760, the 3D scan data of complex curved workpieces can be quickly obtained, and the scanning advantages are clear at a glance.
CO3D solutions
Since the workpiece to be tested is a metal reflector (cannot be sprayed), the volume is small, and the surface is large, the customer needs to quickly scan and obtain high-precision 3D data of the motorcycle to perform product quality inspection. The Hualang engineer according to the customer's needs and the characteristics of the scanned object. The handheld 3D scanner HOLON760 is used to quickly scan and acquire 3D scan data, and the 3D inspection software is used for data analysis to check whether the product is qualified.

Motorcycle parts scene physical map
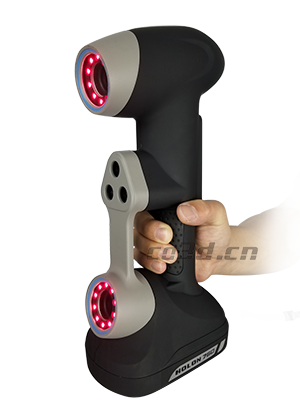
The main features of the handheld 3D scanner HOLON760:
◆ Ultra-portable, the weight of the equipment is only 0.87kg;
◆ Accuracy up to 0.020mm, resolution up to 0.050mm;
◆ Combined with photogrammetry system for higher precision
◆ High speed scanning: 480,000 measurements / sec;
◆ Strong stability, fast scanning speed, easy and convenient operation;
◆ Almost unlimited 3D scanning, regardless of object size, material, color, etc.
Scanning process and test results
The 3D engineer first communicates with the customer in detail to understand the inspection requirements and the characteristics of the samples. Then, based on experience, it is recommended to use the laser handheld 3D scanner HOLON760 as a detection tool.
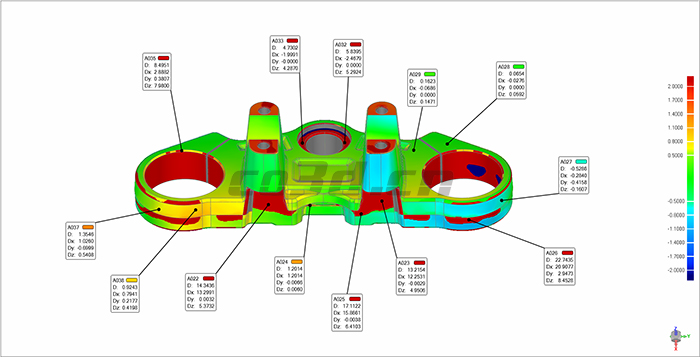
3D inspection analysis chart
The entire scanning process takes only 5 minutes, and finally the acquired 3D data is imported into Geomagic software for analysis, design and improvement.
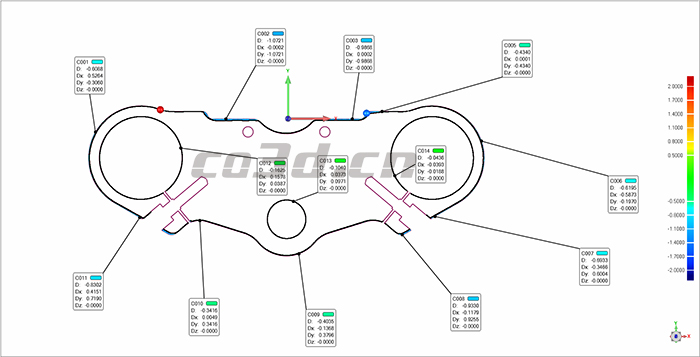
Cross-sectional contrast analysis
The customer is very satisfied with the results of the scan!
Case summary
With the laser handheld 3D scanner, the overall scanning speed is very fast, and the data is complete, and the scanning effect in the details is also very satisfactory to the customer. The analysis report is easy to understand, and the user can intuitively understand the quality problems of the product, providing a complete and reliable basis for 3D detection and reverse design.