Vehicle route inspection
A well-known automobile company hopes to inspect the automobile circuit they produce, obtain 3D data of the automobile circuit, and provide data support for subsequent reverse design and 3D inspection.
Practical problems
1. The line is cylindrical, with different orientations, and the line is up to 5 meters long to be fully scanned, and the customer requires high precision.
2. It is very cumbersome and time-consuming to simply use traditional detection methods (such as inspection tools, jigs, three coordinates, etc.), and it is not easy to accurately and quickly measure and detect the structure of the car line.
Hhuaguang solutions
A well-known automobile company needs to design the car route, to improve the efficiency of measurement, greatly shorten the measurement time, and the accuracy of the measurement must be well controlled. The global measurement accuracy is required to be controlled within 0.1mm. Manual drawing is very time-consuming and cannot keep up. The renewal of the market. After understanding the specific requirements of the company, Hualang engineers used the three-dimensional photogrammetry system (HL-3DP) and three-dimensional scanner (HL-3DW) to scan the car line, after obtaining the three-dimensional data of the car line, secondary design and quality inspection Both are very convenient.
1. 3D photogrammetry
The scanned car line is 5 meters long. Because the line is cylindrical, has different orientations, and requires high accuracy, ordinary 3D scanners are not suitable. Hualang engineers first used the three-dimensional photogrammetry system (HL-3DP) to take multiple images of the car line. Through the three-dimensional distance measurement method, the HOLON3DP software automatically combines these images and performs calculations to obtain the center of each code point. 3D coordinates, calculate the 3D coordinates of key information points on the surface of the car line.
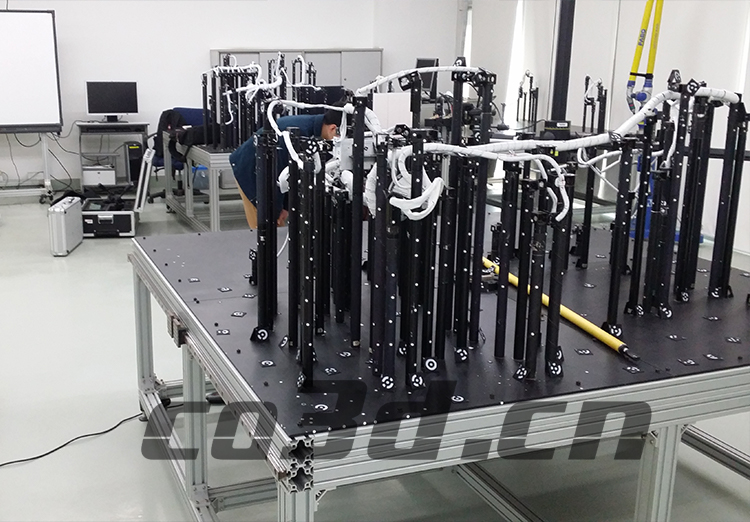
3D scanning scene of car line
2.3D scanning
Import the 3D coordinate data of the car line surface into the HOLON3DS scanning system, and use the three-dimensional scanner (HL-3DW) to quickly obtain high-precision three-dimensional data of the car line. The three-dimensional scanner has the characteristics of super large scanning format, portable design, extremely fast scanning speed, high precision and high stability. The coordination of the 3D photogrammetry system (HL-3DP) and the 3D scanner (HL-3DW) can correct the point cloud information of a large surface area, greatly improve the overall point cloud splicing accuracy of the 3D scanner, and improve work efficiency. It only takes one and a half hours to obtain the three-dimensional data of the car line, with an accuracy of 0.15mm.
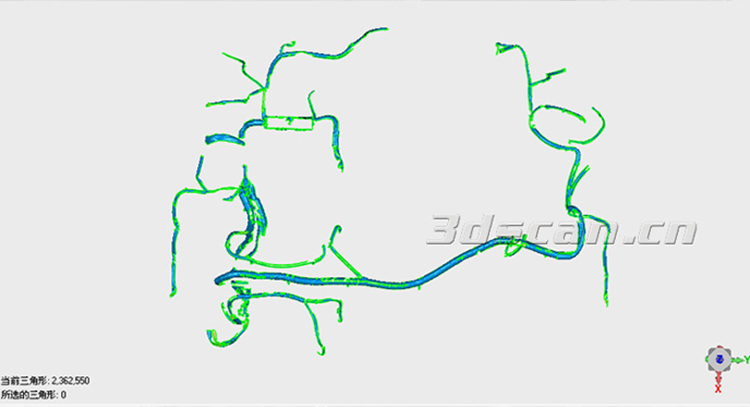
Point cloud data of car routes
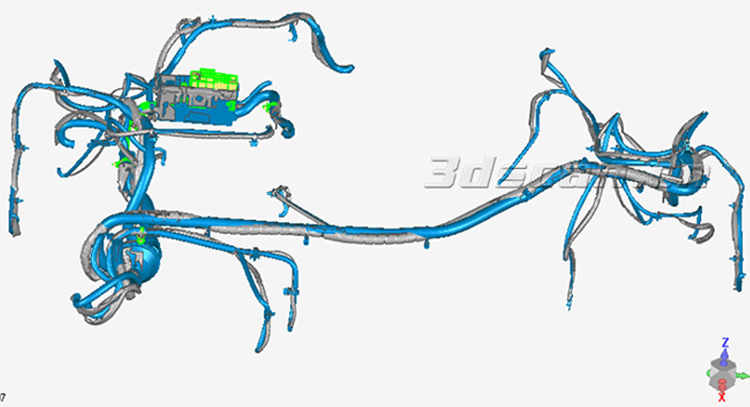
Car line STL data
3. 3D inspection
Import the acquired three-dimensional data of the car line into the inspection software Geomagic Qualify, which can quickly detect the difference between the car line (CAD) model and the manufactured part of the product. Geomagic Qualify can show the difference between the two with intuitive and easy-to-understand graphical comparison results.
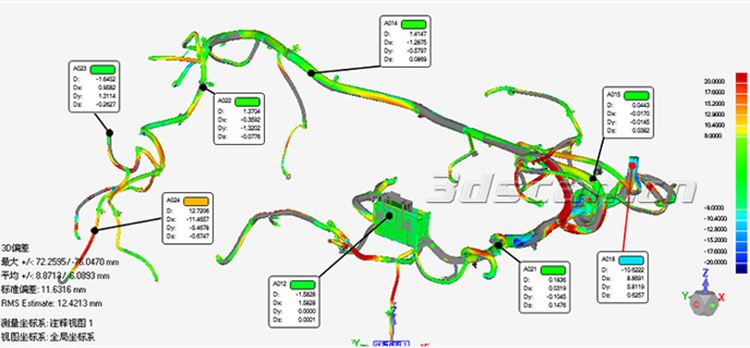
Car line comparison test map
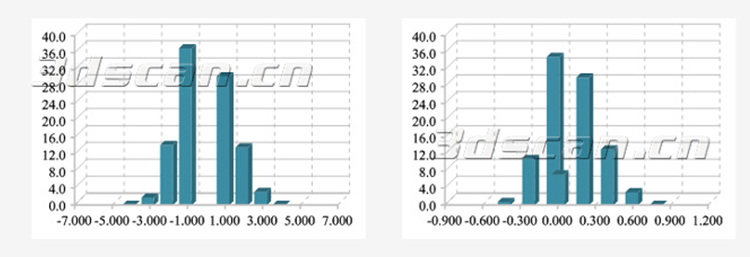
Automobile line histogram analysis chart

Car line comparison test data